Showing posts with label Pinterest. Show all posts

OR.GA.NIZE! #1 Spice Labels

Spice Label Organization


I get very grouchy when the house is a mess, or when there is dust on the floor, or when I can't find something I need...
You know what I mean?
I want it to CHANGE!

So on my quest to be organized, I started a new Pinterest board where I am pinning all the smart, interesting, space-saving, and crafty ideas/projects which will help me fulfill my goal.
And I'm going to share my progress with you!
This means every time I do something from that Pinterest board and it was a success, I will post it here! This series will be called OR.GA.NIZE! Today, I present you with #1. I'm so excited!


Do you, too, have a shelf with spices bunged together in a manner that makes the spice you need UNFINDABLE?
That WAS the case for me. Not anymore! 
This project doesn't cost anything. And most importantly,  it doesn't eat up your whole day! The only tools you'll need are scissors, glue, and a printer.
Here's what I did:


DIY SPICE LABEL ORGANIZATION

  1.     Empty a drawer in your kitchen, and organize everything that was in that drawer into two piles: STUFF TO THROW OUT and STUFF TO PUT ON THE EMPTY SHELF (this helps you get rid of a bunch of unnecessary stuff kicking around!). What empty shelf? The shelf which is currently holding all your spices! Now that your drawer is empty, place all your spices in it, and organize what was in your drawer onto your shelf.
  2.     Now, label all the lids of those spices. Otherwise, it will be hell to recognize them! Click HERE for free printable labels. Cut them out and glue them onto your lids!
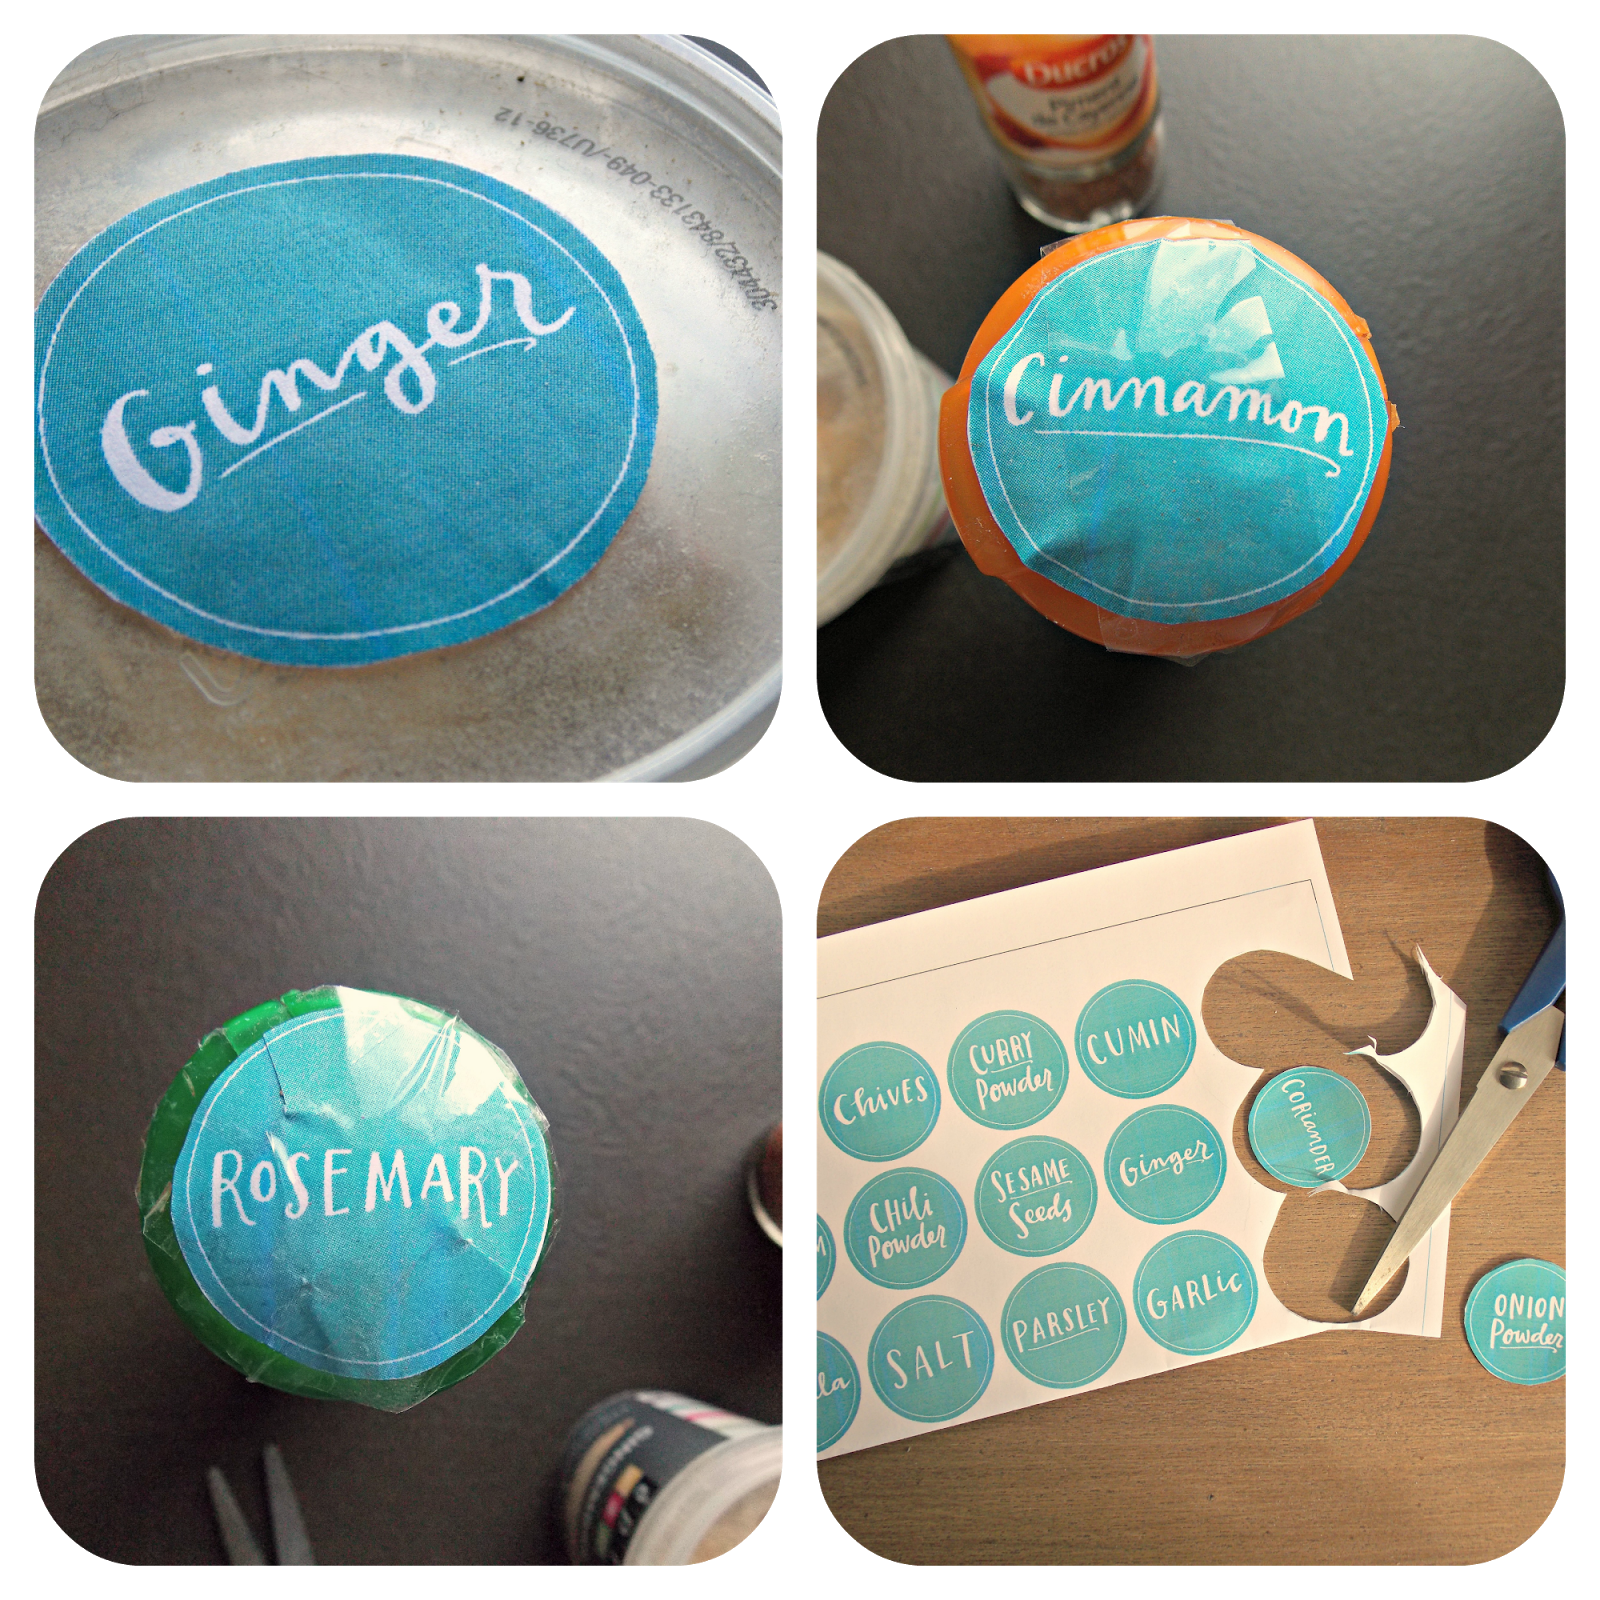
DIY Spice Labels


Spice Label Organization


I had to modify a bunch of the labels, as you can see, but they're still super cute!
Tell me what you think! 


And then you wonder why there's war

I saw this on Pinterest, and thought it was awesome.
When you eat meat, you eat suffering.


This could be my next answer to anybody who asks me why I'm vegetarian.
What do you think?

Autumn things

Fall is here!
I'm not sure I can even explain how I feel about fall... it's so magical. Something about the crisp air, the red and orange leaves floating to the ground and all those big scarves and sweaters brings that same tingly feeling every single year.
Today I wanted to share with you a few things I've been enjoying for the start of fall. I find that we don't always take the time to appreciate the small, ordinary things that bring us joy. Especially when we're feeling down, we forget all about the good in our lives (this is something I need to remind myself of when I start getting into that depressy state... the start of school has been hard at times). So here are a few of the small things that make me smile these days:


...These shoes:


This is another DIY project I found on Pinterest. I bought some white canvas shoes, "raw sienna" acrylic paint, and I put aside a few hours, and ta-da! Here's the result. I've gotten lots of compliments and I can proudly say that I haven't seen anybody else walking around with these sneakers. B)


...Frothy milk in my tea.


A friend of ours that stayed with my brother and me for a week during the summer while my parents were away gave us this milk frother as a present. It's such a fun little touch to my morning (and afternoon) cups of tea.  And I like the foamy moustache it leaves around my mouth.


...Sleep.
These first weeks of school have just been exhausting and I feel like I'm never getting enough sleep. I have to get up early,  and everytime I try to go to bed early something comes up and my bed time is delayed. So when I finally get to turn off the lights, it's a luxury.


Oh! And I almost forgot! I made my Facebook Page!
It would honestly make my day if you liked it right now. I'm not kidding.
Of course, leave me a link to YOUR Facebook page and I'll like it back!


How do you feel about fall?


DIY Necklace Holder

I think I'm addicted to Pinterest. All the mouth-watering recipes, home decor ideas and DIY projects give me a lot to think about. I go into this zone where I imagine how much more practical and fun my life will be with all these projects. I call it my "pinteresty dream time."
We can all agree on how fun it is to pin all these recipes, DIY's and smart tips on everyday tasks, but how many of these pins do we actually use?
A minority.
In my case, other than a few recipes, none.
So I decided that from now on I'm going to make time to pursue some of the creative projects I've pinned to my boards.
I enlisted the help of my meticulous handy-man of a dad to help me make this...
Necklace holder made from old wood and furniture knobs!


Isn't it pretty?

I decided to make this because ever since December when we moved I have felt that our apartment isn't homey and decorated enough. Little by little we've been trying to improve it though.
I bought the furniture knobs at Zara Home and I found the long piece of wood lying in the grass of a park nearby.

To start off we cut the wood because our piece was way too long. The action of sawing created a lovely woodsy smell, which was quite pleasant, the only down side being the wood shavings to be vacuumed afterwards ;)

After that we calculated where the holes for the furniture knobs would go so we could drill holes. I decided to go with a slight zig-zag to make it even more unique.

The only complication after drilling the holes in the wood was that the screws of the furniture knobs were longer than the width of the wood... so in order for the tips of the screws not to stick out of the wood we had to saw parts of them off, which was a little time consuming.

Then the funnest part came: inserting the furniture knobs into the wood!


Once they were screwed in we were done. Then it was time to choose where it would go! My dad installed little hooks on the wall where we decided it would be hung, that way it can be removed easily if needed.

I am very pleased with the result. It gives a nice whimsical touch to my bathroom which was otherwise a bit boring.

Feel free to share with me any projects you've done recently in the comments below, I'd love to hear about what you've been up to creatively!

5 ingredient granola bars

Searching around on pinterest, I came upon this recipe for no-bake, healthy, five ingredient granola bars.
It caught my eye, it called my name. I had to make these.


What's not to love about an easy, delicious, healthy granola bar recipe?
And did I mention delicious?
All the good stuff is packed into these little bricks of heaven: dates, almonds, oats, peanut butter, and honey. And when I say good stuff, I mean good for your taste buds AND your health. These bars are filled with protein, healthy fats, fiber and much more! Only great things can come from eating these.


The prep time is supposed to be 10 minutes, but as it often happens to me when I try a new recipe, it took WAY longer than that. That's because I didn't have the good sense to read the recipe through before embarking on it! When the time came to add the oats to the almond-date mixture, I had to wait 15 minutes for them to toast before stirring them in (you don't HAVE to toast them, but it's recommended if you like the flavor. I think it was worth it.) Oh, well. Live and learn.
Also, I didn't have a good almond-chopping technique... that slowed down the process as well.
I used honey this time, but you can veganize this recipe by using maple or agave syrup (I had a hard time deciding whether I wanted to use honey or maple syrup... they both sounded so yummy! I'll try maple syrup when I make these again.)
My bars don't look as thin and rectangle as they do on Minimalist Baker (which is where the recipe is from) but hey, they're pretty dang awesome.

I have a feeling I'll be making these again and again, as they are the perfect snack to carry around if you need a boost of energy.